How to make a roof in 3ds Max, from hip to gable
A hip roof in Editable Poly from a spline, the maths that turns roof pitch into ridge height, and the point where modelling it by hand stops paying off.
3ds Max ships ready-made objects for walls, doors, windows, stairs and railings. For roofs, it ships nothing. Every roof in an architectural scene starts from an outline you draw — and what separates one method from another is what happens when that outline changes.
This guide builds a hip roof by hand in five steps and shows the calculation that sets the ridge height.
Before modelling: pitch becomes height
Drawings give roof pitch as a percentage. 3ds Max works in height. The conversion is one multiplication: ridge height = half the short span × pitch.
For a house with an 8 m span (half: 4 m):
| Pitch | Angle | Ridge height |
|---|---|---|
| 25% | 14.0° | 1.00 m |
| 30% | 16.7° | 1.20 m |
| 35% | 19.3° | 1.40 m |
| 45% | 24.2° | 1.80 m |
| 100% | 45.0° | 4.00 m |
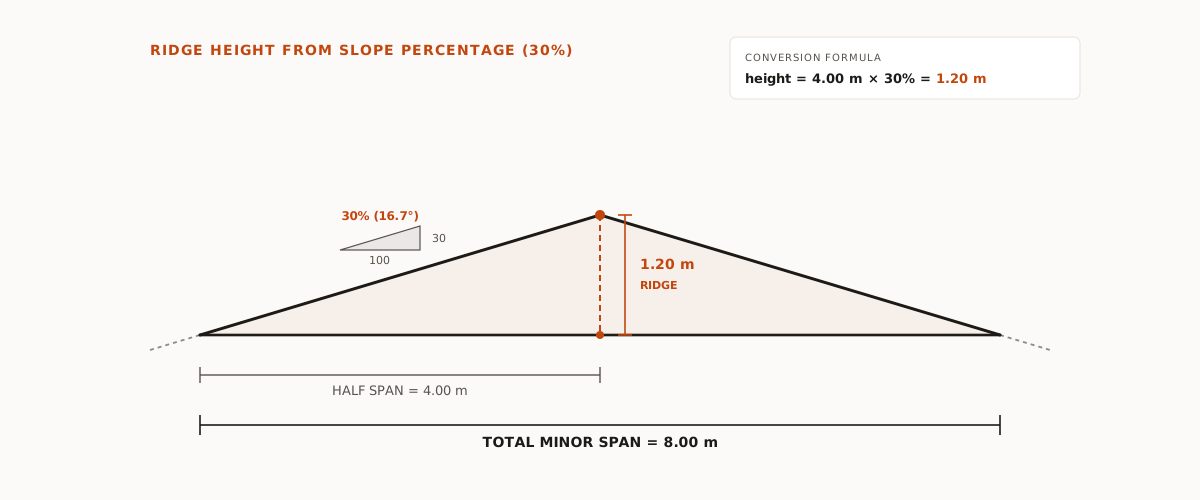
The minimum pitch comes from the manufacturer of the tile you pick. Check it before modelling: it sets the height, not the other way round.
A hip roof in Editable Poly
The example uses a 10 × 8 m rectangular plan, eaves included, at a 30% pitch.
- In the Top viewport, create a 10 m × 8 m Rectangle. This is the roof outline seen from above, eaves included.
- Right-click and pick Convert To > Editable Poly. The closed rectangle becomes a single polygon.
- At Polygon level, select the face and apply Inset with an amount of half the short side: 4 m. The inner polygon collapses across its width into a 2 m line at the centre. That line is the ridge: 10 m − 8 m = 2 m.
- Move the selection 1.20 m up the Z axis. The four slopes appear, with the hips at 45° in plan.
- At Vertex level, select all and use Weld with a 1 mm threshold to merge the vertices left stacked on the ridge. Then add a Shell modifier to give the roof thickness.
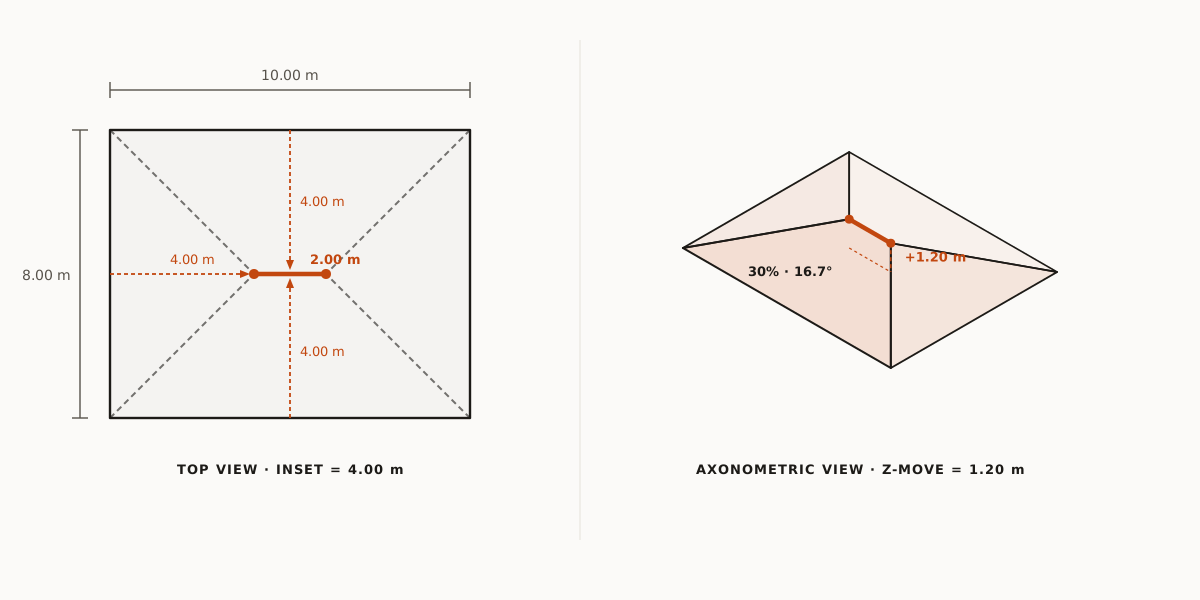
The result is a correct surface for mid-distance renders. A gable roof is shorter still: draw the triangular profile in the Left viewport (8 m base, 1.20 m high) as an open Line, then add Extrude of 10 m and Shell.
The tiles
With the surface in place, there are two ways forward:
- Texture with displacement. Fast and light, good for aerial views. Up close the edge of each slope gives it away: the tile is not there, only its picture.
- Modelled tiles. One piece, arrayed in courses over each slope and cut to the outline with a Boolean. It holds up in close-ups, but it is slope-by-slope work — and every hip needs its own cut.
Where modelling by hand stops paying off
The roof above is correct, but it is dead geometry. None of its vertices knows where it came from. Three common situations force a full rebuild:
- The plan changed. The eaves grew 20 cm or the house gained 1 m in length: the Inset, the height and the tile cuts all come out wrong.
- The pitch changed. Going from 30% to 35% adds 20 cm to the ridge, and the tile courses you already cut no longer fit.
- The plan is not a rectangle. An L-shaped plan brings valleys, the line where two slopes meet inwards. Inset does not solve valleys, and the roof turns into slope-by-slope assembly.
In a design-stage scene, with a client asking for changes, that rework is what eats the afternoon.
The same roof, parametric
AnimArq Roofs is a modifier applied to the same spline from step 1. The outline drives everything: slopes, ridge, hips, valleys and tiles are rebuilt from it whenever it or a parameter changes.
- Draw the outline as in step 1. A poly, mesh or plane also works.
- Apply the modifier. A hip roof appears with default pitch and eaves.
- Choose the roof type and tile profile. Pitch is typed in degrees, percent or X:12.
- Tick what the render needs: framing, gutters, soffit, components.
Tiles are clipped exactly to the outline, including concave plans, plans with holes and plans with a courtyard. Moving from 30% to 35% becomes one spinner.
The unlicensed trial builds the roof surface and a field of up to 3,000 tiles — enough to redo this guide’s example on a house of your own.