Railings in 3ds Max, from spline to code height
Three ways to build a railing in 3ds Max — the native Railing object, the Spacing Tool and a parametric modifier — plus the guard and handrail heights to check before you render.
Railings show up in almost every architectural scene: balconies, stairs, mezzanines, pool edges. They are also among the parts that change most during a project — the landing moves up, the curve opens, the glass becomes a balustrade.
This guide compares three ways of building a railing in 3ds Max and shows what each one does when the path changes.
Before modelling: the heights
A railing at the wrong height shows in the render and fails at approval. The exact figure depends on the local code; two common references:
| Part | Reference | Height |
|---|---|---|
| Guard | IBC (United States) | 42 in (1,067 mm) |
| Handrail | IBC (United States) | 34–38 in (864–965 mm) |
| Guard | NBR 14718 (Brazil) | 110 cm |
| Double handrail | NBR 9050 (Brazil) | 92 and 70 cm |
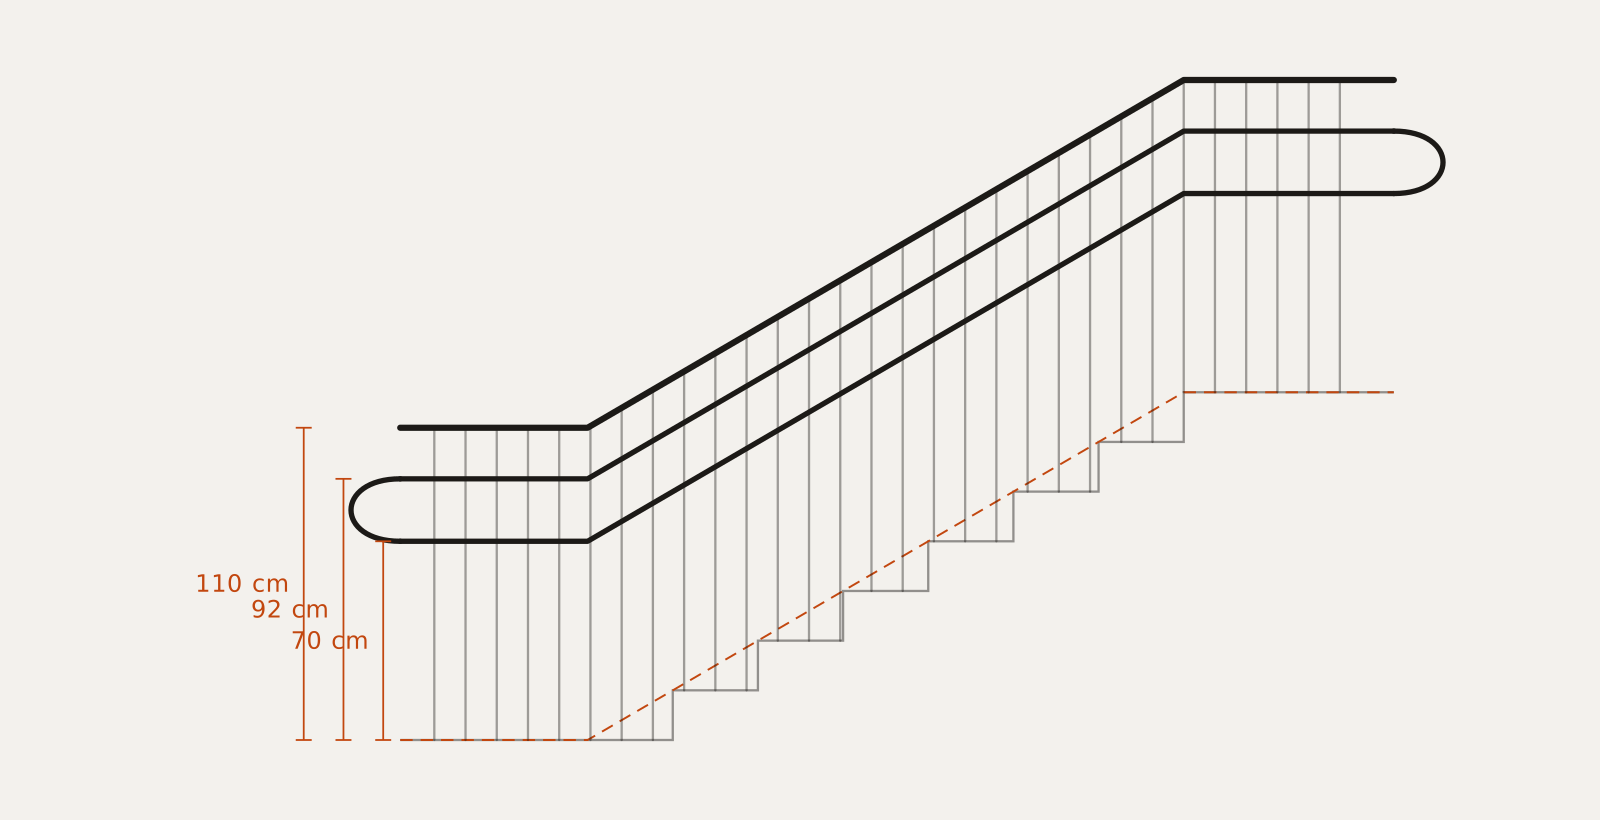
On stairs, height is measured from the line of the stair nosings, not from the landing floor. It is the most common mistake in stair scenes: the railing is right on the landing and low halfway up the flight.
1. The native Railing object
3ds Max ships a railing under Create > Geometry > AEC Extended > Railing.
- Draw the path spline — the balcony edge or the stair line.
- Create the Railing and use Pick Railing Path to point at the spline.
- Set Top Rail, Lower Rails, Posts and Fencing (pickets or a solid panel) in the Modify panel.
It works well for background scenes: it is quick and follows the spline. The limit is the parts. Rails, posts and pickets are simple square or round profiles. A turned baluster, a glass clamp or a post with a base plate from your library cannot go in.
2. Your own parts with the Spacing Tool
When the railing needs your own parts, the manual route is to spread one model along the spline.
- Model a baluster, or bring one from your library.
- Open Tools > Align > Spacing Tool (Shift+I).
- Click Pick Path, point at the spline and set the count or the spacing.
- Tick Follow so the parts turn with the path.
- Build the handrail separately, as a spline with Enable In Renderer or a Sweep on the same path.
The result has the right parts, but it is a pile of loose copies. None of them knows the spline exists. When the path changes, the set is spread again and the handrail is rebuilt.
Corners and curves: where spacing by hand goes wrong
Two details separate a convincing railing from a scale-model one:
- On a curve, spacing is measured along the arc. Spacing by eye, or by straight-line distance, leaves an uneven run — tighter on one side of the curve than the other.
- At a corner, the post belongs to the corner. The corner post sits on the vertex, turned along the angle bisector, and the rail is mitred against it. Without that the part cuts through the corner or leaves a gap.
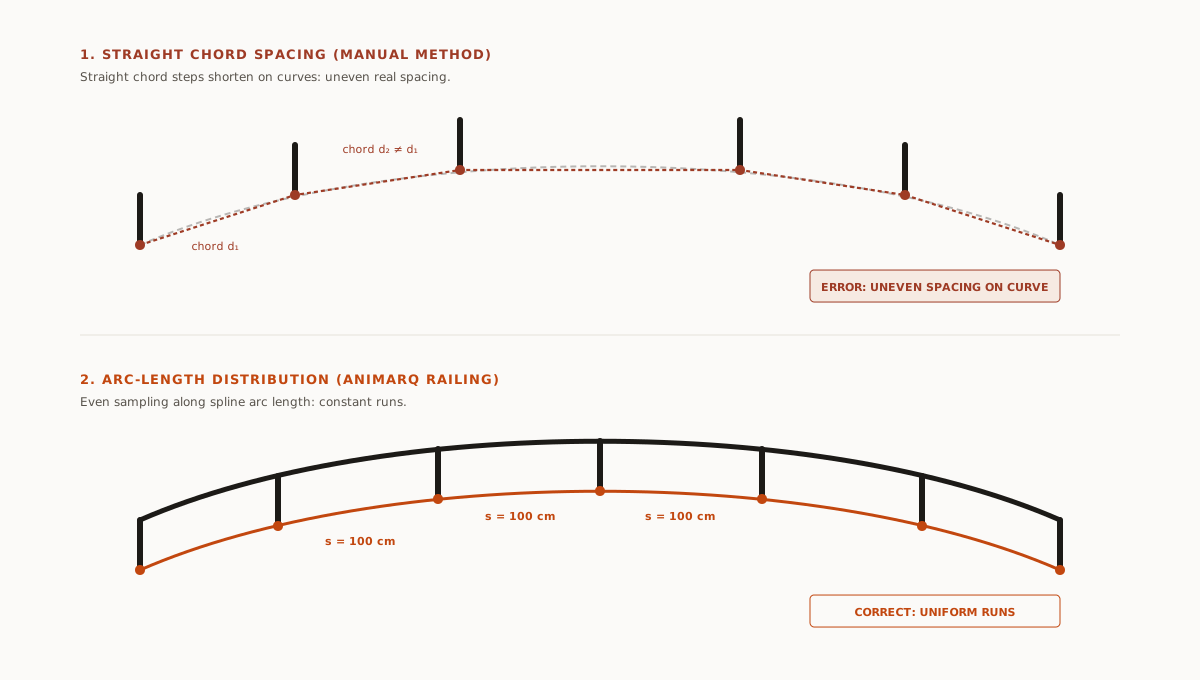
Both can be done by hand. Both are lost at the first change of path.
3. The same railing, parametric
AnimArq Railing is a modifier applied to the path spline. It spreads the modules, raises the start, end and corner posts, sweeps the rails and closes the handrail — and rebuilds everything when the spline or a parameter changes.
- Draw the path, open or closed.
- Apply the modifier. The railing appears in the chosen preset.
- Point at your parts: module, start post, end post, corner post, middle piece and intermediate piece can all be objects from your scene.
- Tune the pitch: distribution mode, spacing, height and code.
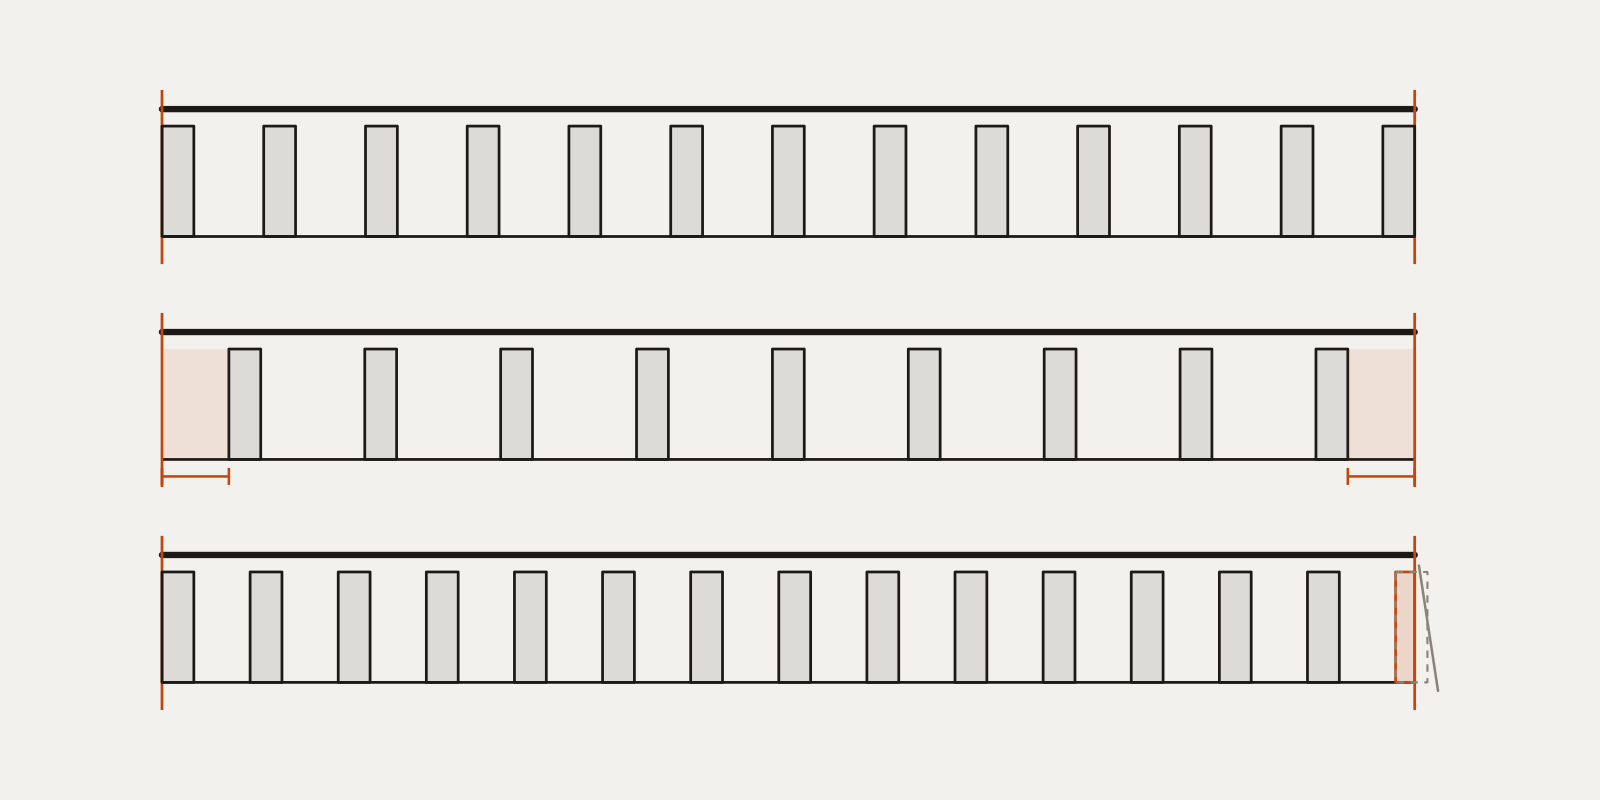
Spacing is sampled by arc length, so it stays even on curves. At corners, the post is oriented along the bisector. The Brazilian codes are built into the generation: under NBR 14718 the guard comes out at 110 cm; under NBR 9050 the handrail comes out double, at 92 and 70 cm, with returns at the ends.
The free trial builds the Iron Handrail and Steel Tube styles over the first 5 m of the path, with no time limit — enough to test spacing, corners and stairs in a scene of your own.